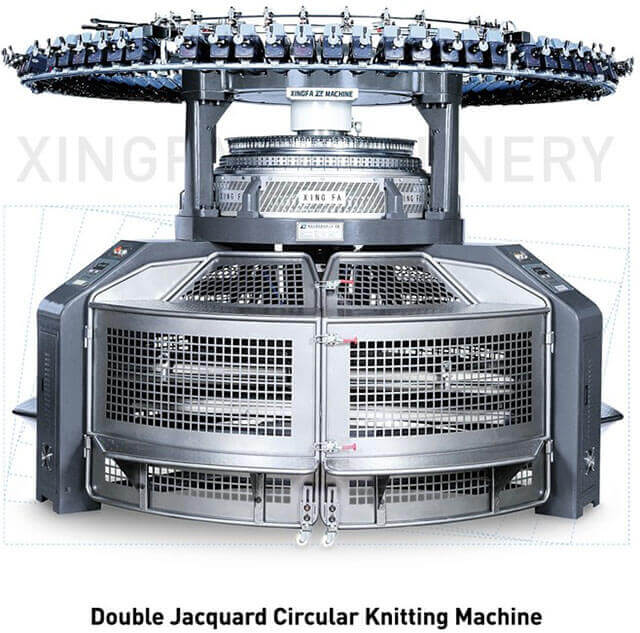
Author:Xingfa Knitting MachineFROM:Circular Knitting Machine Manufacturer TIME:2024-04-22
The Addi Turbo Knitting Machine is a versatile tool for knitters of all skill levels. It allows you to quickly and easily create knitted fabric, whether you're a beginner or an experienced knitter. In this installation guide, we will walk you through the process of setting up your Addi Turbo Knitting Machine and getting started with your first project.
Before you begin, carefully unbox your Addi Turbo Knitting Machine and ensure that all the components are present. The machine should come with the main knitting unit, a crank handle, a row counter, a table clamp, and an instruction manual. Make sure there are no damages or missing parts.
Start by attaching the crank handle to the side of the main knitting unit. Line up the holes on the crank handle with the pins on the side of the machine and press firmly until it clicks into place. Make sure the handle rotates smoothly.
Next, locate the row counter and slide it onto the front of the main knitting unit. Align the hooks on the row counter with the notches on the machine and push it down gently until it locks into place. The row counter will keep track of your knitting progress.

Position the table clamp at the edge of a sturdy table or work surface. Open the clamp by turning the lever counterclockwise, then place the edge of the table between the two jaws of the clamp. Tighten the clamp by turning the lever clockwise until it holds the machine securely in place.

Locate the yarn guide, a small plastic piece with two prongs. Slide the yarn guide onto the front of the main knitting unit, just below the row counter. Make sure the prongs are facing upwards. The yarn guide will help guide the yarn as you knit.

Take your yarn and thread it through the yarn guide, starting from the back and pulling it towards the front. Make sure the yarn is securely threaded through the guide and ready to be knitted. You can use any type of yarn, although lighter weight yarns work best for beginners.
Now that your Addi Turbo Knitting Machine is set up, it's time to start your first project. Place the desired number of stitches on the machine by turning the crank handle clockwise. As you turn the handle, the stitches will be created and move down onto the knitting bed. Continue knitting by turning the handle and guiding the yarn through the yarn guide.
Once you have finished knitting your project, carefully remove it from the machine. Cut the yarn, leaving a long tail for securing the stitches. Use a yarn needle to weave in any loose ends. If you encounter any issues or difficulties while using the Addi Turbo Knitting Machine, refer to the instruction manual for troubleshooting tips.
In conclusion, the Addi Turbo Knitting Machine is a fantastic tool for knitters who want to quickly and easily create knitted fabric. By following the steps outlined in this installation guide, you'll be able to set up your machine and start knitting in no time. Remember to practice and experiment with different yarns and stitch patterns for endless possibilities with your Addi Turbo Knitting Machine.

 Tel: +86-18606960861
 Email:
 MP/WhatsApp: +86-18606960861
 Manufacturer Address:B26-1 Taiwanese high-tech industrial base, Luoyang town , Quanzhou city, Fujian PRO. China.